Showing posts with label Blogging Hacks. Show all posts


Yahoo Media Player is one of the easiest way to play audio files from your website or blog.It is very easy to embed into your site and only display when you click on the audio file name.Yahoo Media Player is not spend long time to load and someone can play all audio files of your website/blog using Play-list.
These are the main features of Yahoo Media Player:
  • Adds audio to your site with one line of HTML
  • Uses simple, easy-to-hack HTML instead of complicated proprietary markup, ushering in the REAL Media Web
  • Magical floating design never gets lost, is available when you need it, gets out of your way when you don't need it
  • Automatically finds all audio links on your page, turning your page into a playlist
  • Plays all your blog entries with a single button click
  • Allows you to put the play buttons where they belong: IN CONTEXT
  • Keeps the user in the page rather than sending them away to a media player
  • Picks up your images and adds them as cover art
  • Requires no download, install or maintenance
Yahoo Media Players
Follow these simple steps to embed Yahoo Media Player to your blog or website.
1.Login to your blogger dashboard--> Design - -> Edit HTML.
2.Scroll down to where you see </head> tag .
3.Copy below code and paste it just before the </head> tag .

<script type="text/javascript" src="http://mediaplayer.yahoo.com/js"></script>


4.Now save your template.
5.Go to Layout --> Page Elements.
6.Click on 'Add a Gadget'.
7.Select 'HTML/Javascript' and add the code given below (You can also add this code into Edit Html section of your Post Editor.):
<a href="DIRECT_URL_OF_YOUR_MP3-FILE">Name_Of_the_Mp3_File</a>
Note:
Replace "DIRECT_URL_OF_YOUR_MP3-FILE" with your .mp3 file direct url.
Replace "Name_Of_the_Mp3_File" with any name you like.
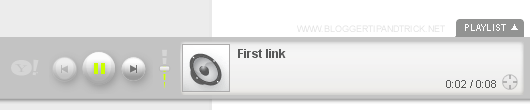
Look at the example given below:
<a href="http://mediaplayer.yahoo.com/example1.mp3">First link</a>
You can see more info about Yahoo Media Player from here : 
http://mediaplayer.yahoo.com/
.
Read More ...

0 comments


Hello friends somebody want to remove post with label but but they did not know how do follow this step.

Follow simple and easy step to solve this problem in blogger blog---->>>>


* First go to your blogger Dashboard.

* Now click in design tab and edit HTML.

* Click in small box to expand your blogger template.

* Find this below code by scrolling or find with CTRL+F key by copy one line of below code.


<b:includable id='status-message'>
    <b:if cond='data:navMessage'>
    <div class='status-msg-wrap'>
    <div class='status-msg-body'>
    <data:navMessage/>
    </div>
    <div class='status-msg-border'>
    <div class='status-msg-bg'>
    <div class='status-msg-hidden'><data:navMessage/></div>
    </div>
    </div>
    </div>
    <div style='clear: both;'/>
    </b:if>
    </b:includable>

* Now remove above code by below code--->>>
<b:includable id='status-message'>
    <b:if cond='data:navMessage'>
    <div>
    </div>
    <div style='clear: both;'/>
    </b:if>
    </b:includable>

* Now save your blogger template and you are done.
Read More ...

0 comments


Hi friends Do you know that adsense unit code get more income by adsense if you add adsense unit code with navbar style below blogger header. now add and earn more.

 Follow simple and easy step to adding this style in blogger blog---->>>>

* First go to your blogger Dashboard.

* Now click in design tab and edit HTML.

* Now click in small box to expand your blogger template.

* Find this code ]]</b:skin> by CTRL+F key.

* Copy below code and paste before ]]</b:skin>
#ads-navbar {
padding:10px 0px 0px 19px;
clear: both;
float: left;
width: 1020px;
height: 25px;
border-bottom: #000 1px solid;
background: #333537 url(https://blogger.googleusercontent.com/img/b/R29vZ2xl/AVvXsEi-15AfZ2dCLji19FdgM_GaQeiKBp8NkvV2EIVJclV6BssU22o2Ef4WYVd_NzmqU-Vz_gQcGacGSMQ9Vdl9tTkZ3FICMsTCOP-OPigo9zhFVHvZ5radiMSRI3jcQQiPPncS2cfjasO6MXwR/) repeat-x top;
}
.googlead {
color:#fff;
float:left;
}
.googlesearch {
float: right;
width: 258px;
margin: 5px 0 0 0;
}

* Now save your blogger template.

* Again go to your blogger Dashboard.

* Now click in design tab and you are here ---->>> Page element.

* Click in add Gadget which is below blogger header .

* When open new window click in HTML/jajascript from list.

* When open new blank box copy below code and paste in blank box.

<div id='ads-navbar'>
ADD HERE YOUR ADSENSE UNIT CODE HERE</div>

* Now click to save your HTML/Javascript and now you are done.
Read More ...

0 comments


* Follow simple and easy step make your blog blogroll Nofollow---->>>>

* First go to your blogger Dashboard.

* Now click in design tab and edit HTML.

* Click in small box to expand your blogger Template.

Scroll down to till you see your Blogroll widget code : <b:widget id='BlogList

Your Blogroll widget code will look like this:--->>>>

<b:widget id='BlogList1' locked='false' title='Blogroll' type='BlogList'>
<b:includable id='main'>
 <!-- only display title if it's non-empty -->
 <b:if cond='data:title != &quot;&quot;'>
   <div id='blog-list-title'>
     <h2 class='title'><data:title/></h2>
   </div>
 </b:if>

 <div class='widget-content'>
   <div class='blog-list-container' expr:id='data:widget.instanceId + &quot;_container&quot;'>
     <ul expr:id='data:widget.instanceId + &quot;_blogs&quot;'>
       <b:loop values='data:items' var='item'>
         <li expr:style='data:item.displayStyle'>
           <div class='blog-icon'>
             <b:if cond='data:showIcon == &quot;true&quot;'>
               <input expr:value='data:item.blogIconUrl' type='hidden'/>
             </b:if>
           </div>
           <div class='blog-content'>
             <div class='blog-title'>
               <a expr:href='data:item.blogUrl' target='_blank'>
                 <data:item.blogTitle/></a>
             </div>
             <div class='item-content'>
               <b:if cond='data:showItemThumbnail == &quot;true&quot;'>
                 <b:if cond='data:item.itemThumbnail'>
                   <div class='item-thumbnail'>
                     <a expr:href='data:item.blogUrl' target='_blank'>
                       <img alt='' border='0' expr:height='data:item.itemThumbnail.height' expr:src='data:item.itemThumbnail.url' expr:width='data:item.itemThumbnail.width'/>
                     </a>
                   </div>
                 </b:if>
               </b:if>
               <b:if cond='data:showItemTitle == &quot;true&quot;'>
                 <span class='item-title'>
                   <b:if cond='data:item.itemUrl != &quot;&quot;'>
                     <a expr:href='data:item.itemUrl' target='_blank'>
                       <data:item.itemTitle/></a>
                   <b:else/>
                     <data:item.itemTitle/>
                   </b:if>
                 </span>
               </b:if>
               <b:if cond='data:showItemSnippet == &quot;true&quot;'>
                 <b:if cond='data:showItemTitle == &quot;true&quot;'>
                   -
                 </b:if>
                 <span class='item-snippet'>
                   <data:item.itemSnippet/>
                 </span>
               </b:if>
               <b:if cond='data:showTimePeriodSinceLastUpdate == &quot;true&quot;'>
                 <div class='item-time'>
                   <data:item.timePeriodSinceLastUpdate/>
                 </div>
               </b:if>
             </div>
           </div>
           <div style='clear: both;'/>
         </li>
       </b:loop>
     </ul>

     <b:if cond='data:numItemsToShow != 0'>
       <b:if cond='data:totalItems &gt; data:numItemsToShow'>
         <div class='show-option'>
           <span expr:id='data:widget.instanceId + &quot;_show-n&quot;' style='display: none;'>
             <a href='javascript:void(0)' onclick='return false;'><data:showNText/></a>
           </span>
           <span expr:id='data:widget.instanceId + &quot;_show-all&quot;' style='margin-left: 5px;'>
             <a href='javascript:void(0)' onclick='return false;'><data:showAllText/></a>
           </span>
         </div>
       </b:if>
     </b:if>

     <b:include name='quickedit'/>
   </div>
 </div>
</b:includable>
</b:widget>

 * Now add rel='nofollow' to your Blogroll widget code as the example below:--->>>

<b:widget id='BlogList1' locked='false' title='Blogroll' type='BlogList'>
<b:includable id='main'>
<!-- only display title if it's non-empty -->
<b:if cond='data:title != &quot;&quot;'>
  <div id='blog-list-title'>
    <h2 class='title'><data:title/></h2>
  </div>
</b:if>

<div class='widget-content'>
  <div class='blog-list-container' expr:id='data:widget.instanceId + &quot;_container&quot;'>
    <ul expr:id='data:widget.instanceId + &quot;_blogs&quot;'>
      <b:loop values='data:items' var='item'>
        <li expr:style='data:item.displayStyle'>
          <div class='blog-icon'>
            <b:if cond='data:showIcon == &quot;true&quot;'>
              <input expr:value='data:item.blogIconUrl' type='hidden'/>
            </b:if>
          </div>
          <div class='blog-content'>
            <div class='blog-title'>
              <a expr:href='data:item.blogUrl' rel='nofollow' target='_blank'>
                <data:item.blogTitle/></a>
            </div>
            <div class='item-content'>
              <b:if cond='data:showItemThumbnail == &quot;true&quot;'>
                <b:if cond='data:item.itemThumbnail'>
                  <div class='item-thumbnail'>
                    <a expr:href='data:item.blogUrl' rel='nofollow' target='_blank'>
                      <img alt='' border='0' expr:height='data:item.itemThumbnail.height' expr:src='data:item.itemThumbnail.url' expr:width='data:item.itemThumbnail.width'/>
                    </a>
                  </div>
                </b:if>
              </b:if>
              <b:if cond='data:showItemTitle == &quot;true&quot;'>
                <span class='item-title'>
                  <b:if cond='data:item.itemUrl != &quot;&quot;'>
                    <a expr:href='data:item.itemUrl' rel='nofollow' target='_blank'>
                      <data:item.itemTitle/></a>
                  <b:else/>
                    <data:item.itemTitle/>
                  </b:if>
                </span>
              </b:if>
              <b:if cond='data:showItemSnippet == &quot;true&quot;'>
                <b:if cond='data:showItemTitle == &quot;true&quot;'>
                  -
                </b:if>
                <span class='item-snippet'>
                  <data:item.itemSnippet/>
                </span>
              </b:if>
              <b:if cond='data:showTimePeriodSinceLastUpdate == &quot;true&quot;'>
                <div class='item-time'>
                  <data:item.timePeriodSinceLastUpdate/>
                </div>
              </b:if>
            </div>
          </div>
          <div style='clear: both;'/>
        </li>
      </b:loop>
    </ul>

    <b:if cond='data:numItemsToShow != 0'>
      <b:if cond='data:totalItems &gt; data:numItemsToShow'>
        <div class='show-option'>
          <span expr:id='data:widget.instanceId + &quot;_show-n&quot;' style='display: none;'>
            <a href='javascript:void(0)' onclick='return false;'><data:showNText/></a>
          </span>
          <span expr:id='data:widget.instanceId + &quot;_show-all&quot;' style='margin-left: 5px;'>
            <a href='javascript:void(0)' onclick='return false;'><data:showAllText/></a>
          </span>
        </div>
      </b:if>
    </b:if>

    <b:include name='quickedit'/>
  </div>
</div>
</b:includable>
</b:widget>

* Now click to save your blogger Template now you are done.

Cheers......
Read More ...

0 comments


Automatic Read More Hack For Blogger With Thumbnails, In every time you create post and add a jump link to post this means Jump link will display full post in post page only.
In other pages it show summary that you select and image if any. In every time you choose some summary. But with this hack you just don't need to locate your image and summary, the script will do all work automatically.Just you have to write your post and publish it with one image in post. If your post not containing any image this will show only summary.


Now how to install Automatic Read More Hack For Blogger With Thumbnails

Note: Backup your template Before applying this hack

Installation:-

  1. Login to Blogger Dashboard
  2. Go to Design Section
  3. Select Edit HTML tab
  4. Check Expand Widgets ( i.e Tick Expand Widgets check box )
  5. Find the closing  </head> tag
  6. Replace it with bellow Code

<script type='text/javascript'>
var thumbnail_mode = "no-float" ; 
summary_noimg = 430;
summary_img = 340;
img_thumb_height = 100;
img_thumb_width = 120;
</script>
<script type='text/javascript' src='http://bloggerblogwidgets.googlecode.com/files/auto_readmore_blogger.js' ></script>
</head>

# in above codes we can change the numeric numbers according to our use

summary_noimg = 430;:Summary length if no image
summary_img = 340;:Summary length if it has image
img_thumb_height = 100;:Thumbnail image height
img_thumb_width = 120;:Thumbnail image width

Now find this <data:post.body/> tag in your template and replace it with below code.

<b:if cond='data:blog.pageType == &quot;item&quot;'>
<data:post.body/>
<b:else/>
<b:if cond='data:blog.pageType == &quot;static_page&quot;'>
<data:post.body/>
<b:else/>
<div expr:id='&quot;summary&quot; + data:post.id'>
<data:post.body/>
</div>
<script type='text/javascript'>
createSummaryAndThumb(&quot;summary<data:post.id/>&quot;);
</script>
<div style='clear: both;'/>
<span class='rmlink' style='font-weight:bold;padding:5px;float:right;text-align:right;'><a expr:href='data:post.url' >Read more ... </a></span>
</b:if>
</b:if>

Finally Save your template and check your blog


For any help contact me via comments and Leave your Responses 
Your comments are always appreciated except Spam comments 
Read More ...

0 comments


1. Login to your Blogger Account
2. Go to Design > Edit HTML
3. Click on the Check box which says "Expand Widget Templates"
4. Now Find this line of code in your template( Use Ctrl + F )
<b:include data='feedLinks' name='feedLinksBody'/>
5.Delete this line
6.Save your Template and the "Subscribe to: Posts(Atom)" link will be completely removed from your Blog.
Read More ...

0 comments


Blogger’s Embedded Comment Form comes in a fixed pixel size. So it might look bad in templates which have a wider post area. so how can we make it look better? – Just adjust the Comment form and increase its width.

So here is what the Transition will look like :)

smaller-blogger-comment-form
would change to
increase-width-of-blogger-comment-form

How To Increase the Width of the Comment Form?
1.Go to Blogger Dashboard > Layout > Edit HTML and opt to expand the Widget Templates.
2. Now look for the code which looks like
<iframe allowtransparency='true' class='blogger-iframe-colorize' frameborder='0' height='275' id='comment-editor' scrolling='no' src='' width='100%'/>
3.To increase the width just change the 100% with the actual pixel size which you need. For example try changing 100% to 560px ,save the template and see the effect. Adjust the pixel size properly till you get the required width for your blogger comment form :)
Read More ...

0 comments


This trick helps you to number each of your comments under a particular post..Thanks to Fernando of Quite Random for this awesome trick.You can read his original tutorial atQuite Random 
I have tried to make it easier for you.. You can implement the trick in 3 simple replacement steps..(and a little SEO is added onto this hack.)


A small Demonumbered-comments-blogger 

Steps involved in implementing this trick

1.Login to your Blogger Dashboard
2.Goto Template >Edit HTML
3.Choose to expand your Widget templates.
4.Find this line of Code
<dl id='comments-block'>
and replace it with
<dl id='comments-block'>
<script type='text/javascript'>var CommentsCounter=0;</script>
5.Now find this line of code
<dt expr:class='&quot;comment-author &quot; + data:comment.authorClass' expr:id='data:comment.anchorName'>
and replace it with
<dt expr:class='&quot;comment-author &quot; + data:comment.authorClass' expr:id='data:comment.anchorName' style='clear: both;'>
6.Now find this line of code
<data:commentPostedByMsg/>
and replace it with
<data:commentPostedByMsg/>
<span class='numberingcomments' style='float: right; font-size: 20px;'>
<a rel='nofollow' expr:href='data:comment.url' title='Comment Link' style='text-decoration:none'>
<script type='text/javascript'>
CommentsCounter=CommentsCounter+1;
document.write(CommentsCounter);
</script>
</a>
</span>
So you should have it working in just 3 replacement steps..:)If everything went well,you should now have a numbered commenting system on your blog.
Read More ...

0 comments


Light box is a really elegant image viewer addon using javascript and the prototype framework.

Installation Steps

1.Login to your Blogger Dashboard
2.Go to Design > Edit HTML
3.Find this piece of code

</head>

and replace it with
<style>
#lightbox{    position: absolute;    left: 0; width: 100%; z-index: 100; text-align: center; line-height: 0;}
#lightbox img{ width: auto; height: auto;}
#lightbox a img{ border: none; }

#outerImageContainer{ position: relative; background-color: #fff; width: 250px; height: 250px; margin: 0 auto; }
#imageContainer{ padding: 10px; }

#loading{ position: absolute; top: 40%; left: 0%; height: 25%; width: 100%; text-align: center; line-height: 0; }
#hoverNav{ position: absolute; top: 0; left: 0; height: 100%; width: 100%; z-index: 10; }
#imageContainer&gt;#hoverNav{ left: 0;}
#hoverNav a{ outline: none;}

#prevLink, #nextLink{ width: 49%; height: 100%; background-image: url(data:image/gif;base64,AAAA); /* Trick IE into showing hover */ display: block; }
#prevLink { left: 0; float: left;}
#nextLink { right: 0; float: right;}
#prevLink:hover, #prevLink:visited:hover { background: url(https://blogger.googleusercontent.com/img/b/R29vZ2xl/AVvXsEgsAvn0I-MLqg3rzwRzfBT5Y6U6pYM_F_7bYAVOj0GWkkqyQKJGOT5bhb_MV3IS0867WQT6qqY-2eov-LPc56HJZ13WbcKwakXi2ooQ0ihevVNOYNqAfK5hZ3wDPWcUKqkt5IHpaAA42v8/) left 15% no-repeat; }
#nextLink:hover, #nextLink:visited:hover { background: url(https://blogger.googleusercontent.com/img/b/R29vZ2xl/AVvXsEiGkuwTNOOzuAB9bqlwMckUAUqcH_KXsafvDfCC9I1Ps5TsSH6wAgMWPczamqx1r8-1NMny4rheLe3VCZJbh5FAdT0xer-IYB96H2y1uoWtc7Jqo9LrF-T4vP0cXrXHMLlKBlqaEaXVLZg/) right 15% no-repeat; }

#imageDataContainer{ font: 10px Verdana, Helvetica, sans-serif; background-color: #fff; margin: 0 auto; line-height: 1.4em; overflow: auto; width: 100%    ; }

#imageData{    padding:0 10px; color: #666; }
#imageData #imageDetails{ width: 70%; float: left; text-align: left; } 
#imageData #caption{ font-weight: bold;    }
#imageData #numberDisplay{ display: block; clear: left; padding-bottom: 1.0em;    }         
#imageData #bottomNavClose{ width: 66px; float: right;  padding-bottom: 0.7em; outline: none;}      

#overlay{ position: absolute; top: 0; left: 0; z-index: 90; width: 100%; height: 500px; background-color: #000; }
</style>
<script src='http://ajax.googleapis.com/ajax/libs/prototype/1.7.0.0/prototype.js' type='text/javascript'/>
<script src='http://ajax.googleapis.com/ajax/libs/scriptaculous/1.8.3/scriptaculous.js' type='text/javascript'/>
<script src='http://blogergadgets.googlecode.com/files/lightbox.js' type='text/javascript'/>
</head>

Adding Images for the Lightbox Viewer

Now you have added the scripts and styles needed for the lightbox.Next part is to add our images..
You can also add captions to your images and also group multiple images into albums. First upload your photo using the blogger photo upload tool.Now switch to the edit html view from the post editor
See the instructions in these images. (Click to view a bigger version.. :))
imageimage
Make sure that you delete the -h from s1600-h .Now you should be able to see the image(which you uploaded) in an overlay LightBox
Options Explained...
adding rel="lightbox" title="Your image Caption" will create a lightbox viewer for the single image.
Demo of a Single Image

Creating an album with light box

If you are making an album out of multiple images, then add rel="lightbox[albumname]" title="Your Image Caption"  to each of the images present in that album. Images with the same albumname will constitute a single Light box overlay, and you can traverse through the album using the Next and Previous Buttons. Images in an album can obviously have different captions, but a common albumname. You can make multiple albums in a single post by choosing different album names.
Read More ...

0 comments