LIVE PREVIEW

HOW TO ADD FLOATING SOCIAL SHARING BAR WIDGET?

First,
  1. Login to New Blogger Dashboard > Choose your Blog and Click the More Options Dropdown
  2. Select the Template > Click on Edit HTML > Proceed
  3. Check/Tick the Expand Template Widgets checkbox
Just follow 3 Simple steps,

THE JQUERY PLUGIN!

As always, it is jQuery based widget, and your blog must have the jQuery plugin. if your blog already have a latest jQuery plugin, then Ignore this step and directly follow the Second step.
If not add the below snippet code before </head> tag
<script type="text/javascript" src="http://ajax.googleapis.com/ajax/libs/jquery/1.7.2/jquery.js"></script>

THE SOCIAL SCRIPTS

This Code contains jQuery calls and Social button scripts and styles, and those are loads only in Post Pages which will decrease, load time when you on home or other pages. ;)
Add the below snippet code before </head> tag
<b:if cond='data:blog.pageType == &quot;item&quot;'>
<style type='text/css'>
/*<![CDATA[*/
 #w2bSocialFloat {clear:both;padding: 6px 0;display:block;background:#FFFFFF;}
 #w2bSocialFloat td{padding:4px;margin:0;border:none;}
 #w2bSocialFloat td iframe{max-width:82px;width:82px !important;}
 #w2bSocialFloat.w2bFloatSocial{position: fixed;top:0;z-index:9999999;border-bottom:1px solid #ccc;-webkit-box-shadow:0 1px 1px rgba(0,0,0,0.15);-moz-box-shadow:0 1px 1px rgba(0,0,0,0.15);box-shadow:0 1px 1px rgba(0,0,0,0.15);}
/*]]>*/
</style>
<script type="text/javascript">
/*<![CDATA[*/
jQuery(document).ready(function(b){var a=b("#w2bSocialFloat");a.wrap('<div id="w2bSocialPlaceholder"></div>').closest("#w2bSocialPlaceholder").height(a.outerHeight());a.width(a.outerWidth());w2bTopPos=a.offset().top;b("#w2bSocialFloat iframe[src*=plusone]").closest("div").css("max-width","82px");b(window).scroll(function(){b(this).scrollTop()>=w2bTopPos?a.addClass("w2bFloatSocial"):a.removeClass("w2bFloatSocial")})});
/*]]>*/
</script>
<script type="text/javascript" src="http://bloggerblogwidgets.googlecode.com/svn/trunk/w2b_blogger_pinit.js"></script>
<script type="text/javascript">
/*<![CDATA[*/
 // Twitter
 (function(a,b,c){var d=a.getElementsByTagName(b)[0];if(!a.getElementById(c)){a=a.createElement(b);a.id=c;a.src="//platform.twitter.com/widgets.js";d.parentNode.insertBefore(a,d)}})(document,"script","twitter-wjs");
 // Google + (plus)
 (function(){var a=document.createElement("script");a.type="text/javascript";a.async=true;a.src="https://apis.google.com/js/plusone.js";var b=document.getElementsByTagName("script")[0];b.parentNode.insertBefore(a,b)})();
 // Stumbleupon
 (function(){var a=document.createElement("script");a.type="text/javascript";a.async=true;a.src="https://platform.stumbleupon.com/1/widgets.js";var b=document.getElementsByTagName("script")[0];b.parentNode.insertBefore(a,b)})();
 // Digg
 (function(){var a=document.createElement("SCRIPT"),b=document.getElementsByTagName("SCRIPT")[0];a.type="text/javascript";a.async=true;a.src="http://widgets.digg.com/buttons.js";b.parentNode.insertBefore(a,b)})();
/*]]>*/
</script>
</b:if>

ADDING SOCIAL BUTTONS WIDGET

Let’s add the final Social horizontal bar widget code.
Add this code before <data:post.body/> tag.
<b:if cond='data:blog.pageType == &quot;item&quot;'>
<div id="w2bSocialFloat" class="w2bSocialFloat">
<table  width="100%" class="w2bSocialFloat">
 <tr>
  <td>
   <a href="https://twitter.com/share" class="twitter-share-button" expr:data-url="data:post.url" expr:data-text="data:post.title">Tweet</a>
  </td>
  <td>
   <iframe expr:src="&quot;//www.facebook.com/plugins/like.php?href=&quot; + data:post.url + &quot;&amp;send=false&amp;layout=button_count&amp;width=80&amp;show_faces=false&amp;action=like&amp;colorscheme=light&amp;font&amp;height=21&quot;" scrolling="no" frameborder="0" style="border:none; overflow:hidden; width:80px; height:21px;" allowTransparency="true"></iframe>
  </td>
  <td>
   <div expr:id="&quot;w2bPinit-&quot; + data:post.id" style="display: none;visibility: hidden;height: 0;width:0;overflow: hidden;" class="w2bPinitButton"> 
    <data:post.body/>
    <script type="text/javascript">
     w2bPinItButton({ 
      url:"<data:post.url/>", 
      thumb: "\<data:post.thumbnailUrl/>", 
      id: "<data:post.id/>", 
      defaultThumb: "https://blogger.googleusercontent.com/img/b/R29vZ2xl/AVvXsEjQcPV_gnFezdGoqTmcpxqw4P-yBPE9expclIRJFM-HKDpo54eRgCVLK2EUjzLQ9zWjQW9hIg7qLS7a4bWzzN3Qguv01JJkHhtnwAz5yo0ugntITvUHbMW1OhauQ5veOB8FFBvLXd-1RokN/s1600/w2b-no-thumbnail.jpg", 
      pincount: "horizontal" 
     }); 
    </script> 
   </div>
  </td>
  <td>
   <div class="g-plusone" data-size="medium" expr:data-href="data:post.url"></div>
  </td>
  <td>
   <su:badge layout="1" expr:location="data:post.url"></su:badge>
  </td>
  <td>
   <a class="DiggThisButton DiggCompact"></a>
  </td>
 </tr>
</table>
</div>
</b:if>

SAVE TEMPLATE!!!

Save the template and check your blog post pages, a working and awesome jQuery based floating social horizontal bar on your blog.
Hope this widget is helpful to you, Please leave your comments, and share this Widget.
Thanks to Raghav! for requesting this simple and awesome widget.

UPDATE :-

1. I FOUND THE TAG THREE TIMES?

If you found the <data:post.body/> three times, then you might using the Auto readmore hack,
Solution:
Search for below two lines
<b:if cond='data:blog.pageType == &quot;item&quot;'>
<data:post.body/>
Place the Widget code in between the two tags.

2. HOW TO CHANGE THE BACKGROUND COLOR OF HORIZONTAL BAR?

You can change the background color of Horizontal bar.
Solution:
In the Second step (The Social Scripts), search for
background:#FFFFFF;
and change the #FFFFFF with your own Hex Color.
Thanks to All.
Read More ...

1 comments


Tip: Copy the code given give below and paste it inside this editor.
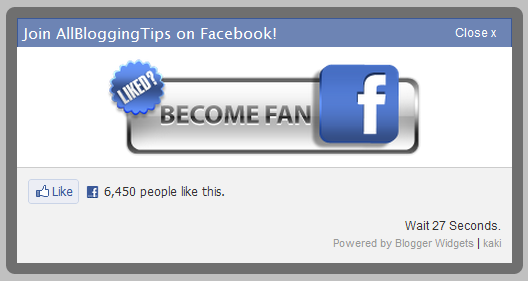
fb fan page with timer

Adding Popup For Facebook Like Box With Timer (Updated!)

You just need to place a code to your blog widget Follow following steps to add Popup For Facebook Like Box With Timer to WordPress and Blogger.
Adding To Blogger
  1. Go To Blogger > Design > Edit HTML
  2. Backup your template
  3. Paste the following code just above </body>
Adding To WordPress
  1. Go to Dashboard > Appearance > Editor > Header.php
  2. Paste the following code just above </body>
<style>#fblikepop {    background-color: #fff;
    display: none;
    position: fixed;
    top: 200px;
    _position: absolute;
 /* hack for IE 6*/
    width: 450px;
    border: 10px solid #6F6F6F;
    z-index: 200;
    -moz-border-radius: 9px;
    -webkit-border-radius: 9px;
    margin: 0pt;
    padding: 0pt;
    color: #333333;
    text-align: left;
    font-family: arial,sans-serif;
    font-size: 13px;
}#fblikepop body {
    background: #fff none repeat scroll 0%;
    line-height: 1;
    margin: 0pt;
    height: 100%;
}

.fbflush {
    cursor: pointer;
    font-size: 11px !important;
    color: #FFF !important;
    text-decoration: none !important;
    border: 0 !important;
}
#fblikebg {
    display: none;
    position: fixed;
    _position: absolute;
 /* hack for IE 6*/
    height: 100%;
    width: 100%;
    top: 0;
    left: 0;
    background: #000000;
    z-index: 100;
}#fblikepop #closeable {
    float: right;
    margin: 7px 15px 0 0;
}#fblikepop h1 {
    background: #6D84B4 none repeat scroll 0 0;
    border-top: 1px solid #3B5998;
    border-left: 1px solid #3B5998;
    border-right: 1px solid #3B5998;
    color: #FFFFFF !important;
    font-size: 14px !important;
    font-weight: normal !important;
    padding: 5px !important;
    margin: 0 !important;
    font-family: "Lucida Sans Unicode", "Lucida Grande", sans-serif !important;
}#fblikepop #actionHolder {
    height: 30px;
    overflow: hidden;
}#fblikepop #buttonArea {
    background: #F2F2F2;
    border-top: 1px solid #CCCCCC;
    padding: 10px;
    min-height: 50px;
}#fblikepop #buttonArea a {
    color: #999999 !important;
    text-decoration: none !important;
    border: 0 !important;
    font-size: 10px !important;
}#fblikepop #buttonArea a:hover {
    color: #333 !important;
    text-decoration: none !important;
    border: 0 !important;
}#fblikepop #popupMessage {
    font-size: 12px !important;
    font-weight: normal !important;
    line-height: 22px;
    padding: 8px;
    background: #fff !important;
}#fblikepop #counter-display {
    float: right;
    font-size: 11px !important;
    font-weight: normal !important;
    margin: 5px 0 0 0;
    text-align: right;
    line-height: 16px;
}</style>
<script src="http://www.google.com/jsapi"></script><script>google.load("jquery", "1");</script>
<script type="text/javascript" src="http://connect.facebook.net/en_US/all.js#xfbml=1"></script>
<script type="text/javascript">
//<![CDATA[
 kakinetworkdotcom01username="android-blogstuff",
 kakinetworkdotcom01title="Join us at Facebook!",
 kakinetworkdotcom01skin="04",
 kakinetworkdotcom01time="20",
 kakinetworkdotcom01wait="0",
 kakinetworkdotcom01lang="en"
//]]>
</script>
<script type="text/javascript" src="http://allbloggingtips.com/wp-content/uploads/2012/06/popup-with-timer-codez.js"></script>
<script type="text/javascript">
//<![CDATA[
 $(document).ready(function(){$().kakinetworkdotcom({ closeable: true });});
//]]>
</script>

Make following important changes:

  • Replace this AllBloggingTips with your Facebook username.
  • The timer is set to 20 seconds to change it simply edit timeout: 20
  • The widget appears immediately after a visiter enter your blog/site. If you want it to appear after one minute or more then edit wait: 0
Read More ...

1 comments


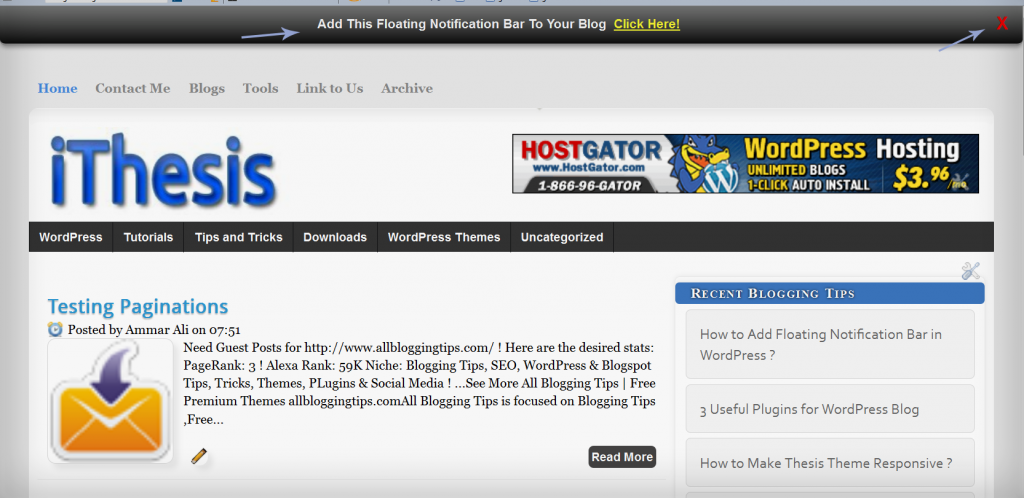
Add Cool Floating Notification bar in Blogger !

First  Always Back Up Your Template Before You Any Make Changes – How To Back Up A Blogger Template
  • Goto Blogger  => Design => Edit HTML
  • Next search for this code
<body>
  •   Just below it paste the following code,
<!-- Notification code start -->
<style type='text/css'>
#ut-sticky
{
background: #7d7e7d; /* Old browsers */
background: -moz-linear-gradient(top,  #7d7e7d 6%, #7d7e7d 9%, #0e0e0e 99%); /* FF3.6+ */
background: -webkit-gradient(linear, left top, left bottom, color-stop(6%,#7d7e7d), color-stop(9%,#7d7e7d), color-stop(99%,#0e0e0e)); /* Chrome,Safari4+ */
background: -webkit-linear-gradient(top,  #7d7e7d 6%,#7d7e7d 9%,#0e0e0e 99%); /* Chrome10+,Safari5.1+ */
background: -o-linear-gradient(top,  #7d7e7d 6%,#7d7e7d 9%,#0e0e0e 99%); /* Opera 11.10+ */
background: -ms-linear-gradient(top,  #7d7e7d 6%,#7d7e7d 9%,#0e0e0e 99%); /* IE10+ */
background: linear-gradient(top,  #7d7e7d 6%,#7d7e7d 9%,#0e0e0e 99%); /* W3C */
filter: progid:DXImageTransform.Microsoft.gradient( startColorstr=&#39;#7d7e7d&#39;, endColorstr=&#39;#0e0e0e&#39;,GradientType=0 ); /* IE6-9 */

border-bottom:2px solid #999;

color:#fff;
text-align: center;
margin:-12px auto;
padding-bottom:1px;
border-top: 1px solid #333;
height:38px;
font-size:13px;
position:fixed;
vertical-align: baseline; overflow:hidden;
z-index:999;
width:100%;
border-bottom-left-radius:6px;
border-bottom-right-radius:6px;
display:block;
font-weight: bold;
font-family: arial,&quot;Helvetica&quot;;
font-color:#fff;
 -moz-box-shadow: 0 2px 4px hsla(0,0%,0%,.35);
 -webkit-box-shadow: 0 2px 4px hsla(0,0%,0%,.35);
}
#ut-sticky:hover
{

background-color:#333;background-image:-moz-linear-gradient(top,#555555,#434343);background-image:-ms-linear-gradient(top,#555555,#434343);background-image:-webkit-gradient(linear,0 0,0 100%,from(#555555),to(#434343));background-image:-webkit-linear-gradient(top,#555555,#434343);background-image:-o-linear-gradient(top,#555555,#434343);background-image:linear-gradient(top,#555555,#434343);background-repeat:repeat-x;filter:progid:DXImageTransform.Microsoft.gradient(startColorstr=&#39;#555555&#39;,endColorstr=&#39;#434343&#39;,GradientType=0)

-webkit-transition:all 1.3s ease-in-out;-moz-transition:all 1.3s ease-in-out;-o-transition-duration:all 1.3s ease-in-out;transition:all 1.3s ease-in-out;

 -moz-box-shadow: 0 2px 4px hsla(0,0%,0%,.35);
 -webkit-box-shadow: 0 2px 4px hsla(0,0%,0%,.35);

}

#ut-button {background:#fff; padding:4px; color:black;text-shadow:0 -1px 0 rgba(255,255,255,0.25);background-color:white}

#ut-sticky p{line-height:5px; font-size:13px; text-align:center; width:95%; float:left;}
#ut-sticky p a{ text-decoration:underline; padding:4px; color:#FFFF33;}
.ut-cross{display:block; position:relative; right:15px; top:4px;float:right;}
.ut-cross a{font-size:18px; font-weight:bold; font-family:&quot;Arial&quot;; color:#FF0000; line-height:30px;}
.ut-cross, a:hover{color:#DDD; text-decoration:none;}

</style>
<div id='ut-sticky'>
<p style='padding-top:17px;'>Add This Floating Notification Bar To Your Blog <a class='ut-button' href='http://www.android-blogstuff.blogspot.com' target='_blank'>Click Here!</a></p>
<div class='ut-cross'><a href='javascript:hide_cross();'>X</a></div>
</div>
<script language='JavaScript'>
function hide_cross() {
crosstbox = document.getElementById(&quot;ut-sticky&quot;);
crosstbox.style.visibility = &#39;hidden&#39;;
}
</script>
<br/><br/>
<br/><br/>
<!-- End of Notification code, info - http://www.allbloggingtips.com -->
To Customize it
After adding above code just edit above HIGHLIGHTED text and link to your desire text.
I hope you enjoyed this cool Floating Notification bar widget. Do let me know if you face any problem.


Read More ...

0 comments

You can Install This Widget Easily in your Blog By Following These Simple Steps....

Before you edit any template it's better to keep a Backup..
So First Backup your Template. Now Go To Design>Edit Html>Select Expand Widgets...

Demo : Click Here 

Step 1 : The CSS You Need To Search The Following Piece Of Code By Pressing [Ctrl+F]

Read More ...

0 comments


In this article,I am going to explain how to add more attractive Subscribe Section + Search Box to your blogger blog.This subscribe section is included Feedburner feed and Email subscriptions boxes,Twitter and Facebook boxes for your Twitter and Facebook profiles and Social networking buttons(Digg,Twitter,Facebook,Stumbleupon,Delicious) to share your articles among social networks.These social network buttons are powered by www.addthis.com.Above the subscribe section,Search box is included.You don't want to change anything in the search box code.To add this widget to your blogger sidebar without doing any modification,sidebar width must be at least 305 px. You can add this Subscribe Section + Search Box into your blog within few seconds and very easy to configure.If you like to add this widget to your blog or a website,then follow the steps given below.
Attractive Subscribe Section + Search Box
1.Login to your blogger dashboard --> Design --> Edit HTML
2.Scroll down to where you see </head> tag .
3.Copy below code and paste it just before the </head> tag .

<style type="text/css">
.subbox{width:305px;border:0 solid #141414;overflow:hidden}
.addthis_toolbox{padding:15px 0 5px 0;text-align:center}
.addthis_toolbox .custom_images a{width:32px;height:32px;margin:0 4px 0 4px;padding:0}
.addthis_toolbox .custom_images a:hover img{opacity:1}
.addthis_toolbox .custom_images a img{opacity:0.85}
.rssbox{background:#f7f6f6;border:1px solid #ccd1d7;padding:5px 10px;margin:10px 0 0 0;-moz-border-radius:10px;-khtml-border-radius:10px;-webkit-border-radius:10px;border-radius:10px;width:125px}
.rssbox:hover{border:1px solid #92aed1}
.rssbox a{color:#7c8a9b;text-transform:uppercase;text-decoration:none;font:bold 12px Arial,Helvetica,Sans-serif}
.rssbox a:hover{color:#7c8a9b;text-decoration:underline}
.emailsbox{background:#f7f6f6;border:1px solid #ccd1d7;padding:5px 10px;margin:10px 0 0 0;-moz-border-radius:10px;-khtml-border-radius:10px;-webkit-border-radius:10px;border-radius:10px;width:125px}
.emailsbox:hover{border:1px solid #92aed1}
.emailsbox a{color:#7c8a9b;text-transform:uppercase;text-decoration:none;font:bold 12px Arial,Helvetica,Sans-serif}
.emailsbox a:hover{color:#7c8a9b;text-decoration:underline}
.twitterbox{background:#f7f6f6;border:1px solid #ccd1d7;padding:5px 10px;margin:10px 0 0 0;-moz-border-radius:10px;-khtml-border-radius:10px;-webkit-border-radius:10px;border-radius:10px;width:125px}
.twitterbox:hover{border:1px solid #92aed1}
.twitterbox a{color:#7c8a9b;text-transform:uppercase;text-decoration:none;font:bold 12px Arial,Helvetica,Sans-serif}
.twitterbox a:hover{color:#7c8a9b;text-decoration:underline}
.facebookbox{background:#f7f6f6;border:1px solid #ccd1d7;padding:5px 10px;margin:10px 0 0 0;-moz-border-radius:10px;-khtml-border-radius:10px;-webkit-border-radius:10px;border-radius:10px;width:125px}
.facebookbox:hover{border:1px solid #92aed1}
.facebookbox a{color:#7c8a9b;text-transform:uppercase;text-decoration:none;font:bold 12px Arial,Helvetica,Sans-serif}
.facebookbox a:hover{color:#7c8a9b;text-decoration:underline}
#search{width:290px;padding:2px 2px;background:#f7f6f6;border:1px solid #ccd1d7;height:28px;margin-top:0;margin-left:5px;display:inline;float:left}
#search:hover{border:1px solid #92aed1}
#search form{margin:0;padding:0}
#search fieldset{margin:0;padding:0;border:none}
#search p{margin:0;font-size:85%}
#s{width:200px;margin:0 0 0 0;padding:5px 5px 5px 5px;border:none;font:normal 80% &quot;Tahoma&quot;,Arial,Helvetica,sans-serif;color:#000;float:left;background:#f7f6f6;display:inline}
input#searchsubmit{float:right;display:inline;margin:0 0 0 0;height:28px;background:#b2b2b2;color:#000;border:0 solid #222}
</style>
Save your template.
4.Now go to Design --> Page Elements and click on "Add a gadget".
5.Select "html/java script" and add the code given below and click save.
<div class="subbox">
<div id='search' style='display:inline;'>
<form action='/search' id='searchform' method='get'>
<input id="s" name="q" onblur="if (this.value == &quot;&quot;) {this.value = &quot;Search...&quot;;}" onfocus="if (this.value == &quot;Search...&quot;) {this.value = &quot;&quot;;}" type="text" value="Search..." />
<input id="searchsubmit" type="submit" value="Search" />
</form>
</div>
<table><tr>
<td><div class="rssbox">
<a href="http://feeds.feedburner.com/FEEDBURNER-ID" target="_blank" rel="nofollow"><img src="https://blogger.googleusercontent.com/img/b/R29vZ2xl/AVvXsEjUAt42ikzQG72H3eCzfKy-tpy-TATr_-2t3jT1SZDRWoWlrPIYOJnI0Kq7aDRx3JbONXBDFQPPG1QUS6J5gtT7dxKG5amT5HlkMdCiMcKHmi0ChDP7-Jd5tRACnQf3d3N0qZPzHCbfaj53/"  alt="RSS Feed" title="RSS Feed" style="vertical-align:middle; margin-right: 5px;border:none;"  /></a><a href="http://feeds.feedburner.com/FEEDBURNER-ID" target="_blank" rel="nofollow">RSS Feed</a>
</div></td>
<td><div class="emailsbox">
<a href="http://feedburner.google.com/fb/a/mailverify?uri=FEEDBURNER-ID" target="_blank" rel="nofollow"><img src="https://blogger.googleusercontent.com/img/b/R29vZ2xl/AVvXsEiwzOPgYTLwwr0SHtXPe2-mK1bv2iUzsaWgu8OiNSZmShbHCvMlzOEJBEv7SBBN0AZDVzisgOHWmlvsSbKog0RoShTbQPaD8JWUvD6OsPbobJ8T58tIvlarO160_QnZGCW8JtSnxK6n1cgW/"  alt="EMail Feed" title="EMail Feed" style="vertical-align:middle; margin-right: 5px;border:none;"  /></a><a href="http://feedburner.google.com/fb/a/mailverify?uri=FEEDBURNER-ID" target="_blank" rel="nofollow">EMail Feed</a>
</div></td>
</tr><tr>
<td><div class="twitterbox">
<a href="http://twitter.com/TWITTER-USERNAME" target="_blank" rel="nofollow"><img src="https://blogger.googleusercontent.com/img/b/R29vZ2xl/AVvXsEhOLVNxHveH5xQH8z1rJ5IQxynidQvEPVY5FSTdIpYei5bPZ7S4ZyO03cf48ZzWBF0fxT7qIPBXvLXCy0KICbb3dn_8Ywtt0U62aAmQXnFpCUs3Ib6sgaVWjDbG-HyVXIJ0tAbrV9Rnz_tf/"  alt="Twitter" title="Twitter" style="vertical-align:middle; margin-right: 5px;border:none;"  /></a><a href="http://twitter.com/TWITTER-USERNAME" target="_blank" rel="nofollow">Twitter</a>
</div></td>
<td><div class="facebookbox">
<a href="http://www.facebook.com/FACEBOOK-USERNAME" target="_blank" rel="nofollow"><img src="https://blogger.googleusercontent.com/img/b/R29vZ2xl/AVvXsEggRUT9DYocDDNcDnTFZIdMSq7jXYk8szue3ycytoKR4VzXEq4vJyXrtvEi7eGGhuQJRfl_YAPb4qLKcqVJYeoshCtgPg1a-3CJl79jNt1N9PgpWtJ0Uar76pR4cOVEKv8_jKzeNP2Xcv_c/"  alt="Facebook" title="Facebook" style="vertical-align:middle; margin-right: 5px;border:none;"  /></a><a href="http://www.facebook.com/FACEBOOK-USERNAME" target="_blank" rel="nofollow">Facebook</a>
</div></td>
</tr></table>
<p style="display:none;" align="center">Widget by <a href="http://www.bloggertipandtrick.net/" target="_blank">Blogger Tips And Tricks</a></p>
<div class='addthis_toolbox'>
<div class='custom_images'>
<a class='addthis_button_twitter'><img alt='Twitter' height='32' src='https://blogger.googleusercontent.com/img/b/R29vZ2xl/AVvXsEh44N08H6KEXGCVZmJ7d_5jHUX3IJVg0zvuFNRq7ALwAYU7NbMlh-KMLfBDnCkXcZlKopbHsLV0Xpc583fbmrNZCrubf4sE0o5BPWZ7nCREnr6FWI3GbRCKa5cYunnAacwXPvu6pZc9j-Q/' width='32'/></a>
<a class='addthis_button_delicious'><img alt='Delicious' height='32' src='https://blogger.googleusercontent.com/img/b/R29vZ2xl/AVvXsEhCw6B8k6nHft0_WT9eSIplfyS-JZiNrjuGzF8K6BYTb5GfWvMWUinRK5ymXBTbr7YTVAwoRcTKTTWy0C4mZullCAQ9t4_uWCuXMReSKbeoNoU9JTIACCAE1vnhkvnEnUDPPELzAAFLVHA/' width='32'/></a>
<a class='addthis_button_facebook'><img alt='Facebook' height='32' src='https://blogger.googleusercontent.com/img/b/R29vZ2xl/AVvXsEhJFbVbPu4Q7GGEam9-fWKrCWuHs-nLzD7W07PFRitZ8SVsG2UF4KCmVwZcIUNz19wQ6v1lYHVljsnQsRO641QI0cCJkgHBdIvfBaw_cp9qGOxVMSFm1Df1Bq07G9CZc1xF7CfF2GdVLIY/' width='32'/></a>
<a class='addthis_button_digg'><img alt='Digg' height='32' src='https://blogger.googleusercontent.com/img/b/R29vZ2xl/AVvXsEhuuWsdfqXrzLBmTg_yW2cdTzvtJGmEmjCfvEkGx6CZm2Owrh6hnFXvUYAhLMB3QOfr5WP08SF7lwo6jiWuj5QghzUICXkD3dPhEqfitzqRXMbB5rC2oiL7WVEA5JtzbNE_suws9rLukok/' width='32'/></a>
<a class='addthis_button_stumbleupon'><img alt='Stumbleupon' height='32' src='https://blogger.googleusercontent.com/img/b/R29vZ2xl/AVvXsEgAXZtkVR0y_JuCbSUjSRlUuUDj_Slzt2_AA52kYOFnH_sHOraUMJ0NvT4mmF6ExvPIqghiFlosgiXOdGDGrcs04vy9UMis9H6gUqpAa9HdRiOZczSKo3U_J4F1UbP7p9djTcQksVFmBjc/' width='32'/></a>
<a class='addthis_button_favorites'><img alt='Favorites' height='32' src='https://blogger.googleusercontent.com/img/b/R29vZ2xl/AVvXsEh2Y5IhwuWHy_LWO_VjQiu3m7c_knTDS1BBLPHjYk8OCP-IWps-Frc8tyx8akP1EWnvJ6ay-K43k37Huqsg5B31PVFyMg2mj8LZJQY4F-v9yHBhXUenOO6hHpNjQMhLWpZJldjS7xz30zc/' width='32'/></a>
<a class='addthis_button_more'><img alt='More' height='32' src='https://blogger.googleusercontent.com/img/b/R29vZ2xl/AVvXsEg2m7pFUWU9ET0xj3v8aH1NgQvzLtPsmeIxpi3HUK2FFLQqAy5WS33c0_Je3Lkk0emHpulC-CxLrANZN-fmLVRZLxOzkUjvKKulZcsNXwdxNMiTvZrjJoI_1h9gzs7q75t5BmXpHyQIFA8/' width='32'/></a>
</div>
<script src='http://s7.addthis.com/js/250/addthis_widget.js' type='text/javascript'/>
</div>
</div>
NOTE : Remember to Replace,
FEEDBURNER-ID with your real Feedburner ID.(4 times). TWITTER-USERNAME with your real Twitter username. FACEBOOK-USERNAME with your real Facebook username.
You are done.

Read More ...

0 comments